


That Broken Brooch Deserves a Second Life: A Guide to Costume Jewelry Restoration
Costume jewelry restoration is the process of returning a worn, broken, or tarnished fashion jewelry piece to a wearable, beautiful condition — and it's more achievable than most people think.
Here's a quick overview of what restoration actually involves:
| What You Want to Do | What It's Called | DIY Possible? |
|---|---|---|
| Remove dirt, oils, and surface tarnish | Cleaning | Yes |
| Fix one specific broken part (clasp, stone, chain) | Repair | Often yes |
| Fully return a piece to its original appearance and structure | Restoration | Sometimes — depends on the piece |
That piece sitting in your jewelry box — tarnished, missing a stone, or with a broken clasp — very likely can be saved. Vintage costume jewelry is made from base metals like brass, copper, and zinc, with simulated stones made of glass, plastic, or cubic zirconia. These materials respond well to the right techniques.
And here's the thing: costume jewelry styles change so fast that manufacturers rarely produce the same piece twice. If a beloved piece breaks, restoration is often your only option for keeping it.
At Inglis Jewellers, we've helped customers across Atlantic Canada repair and restore pieces that matter to them — and we're here to walk you through exactly how it's done.
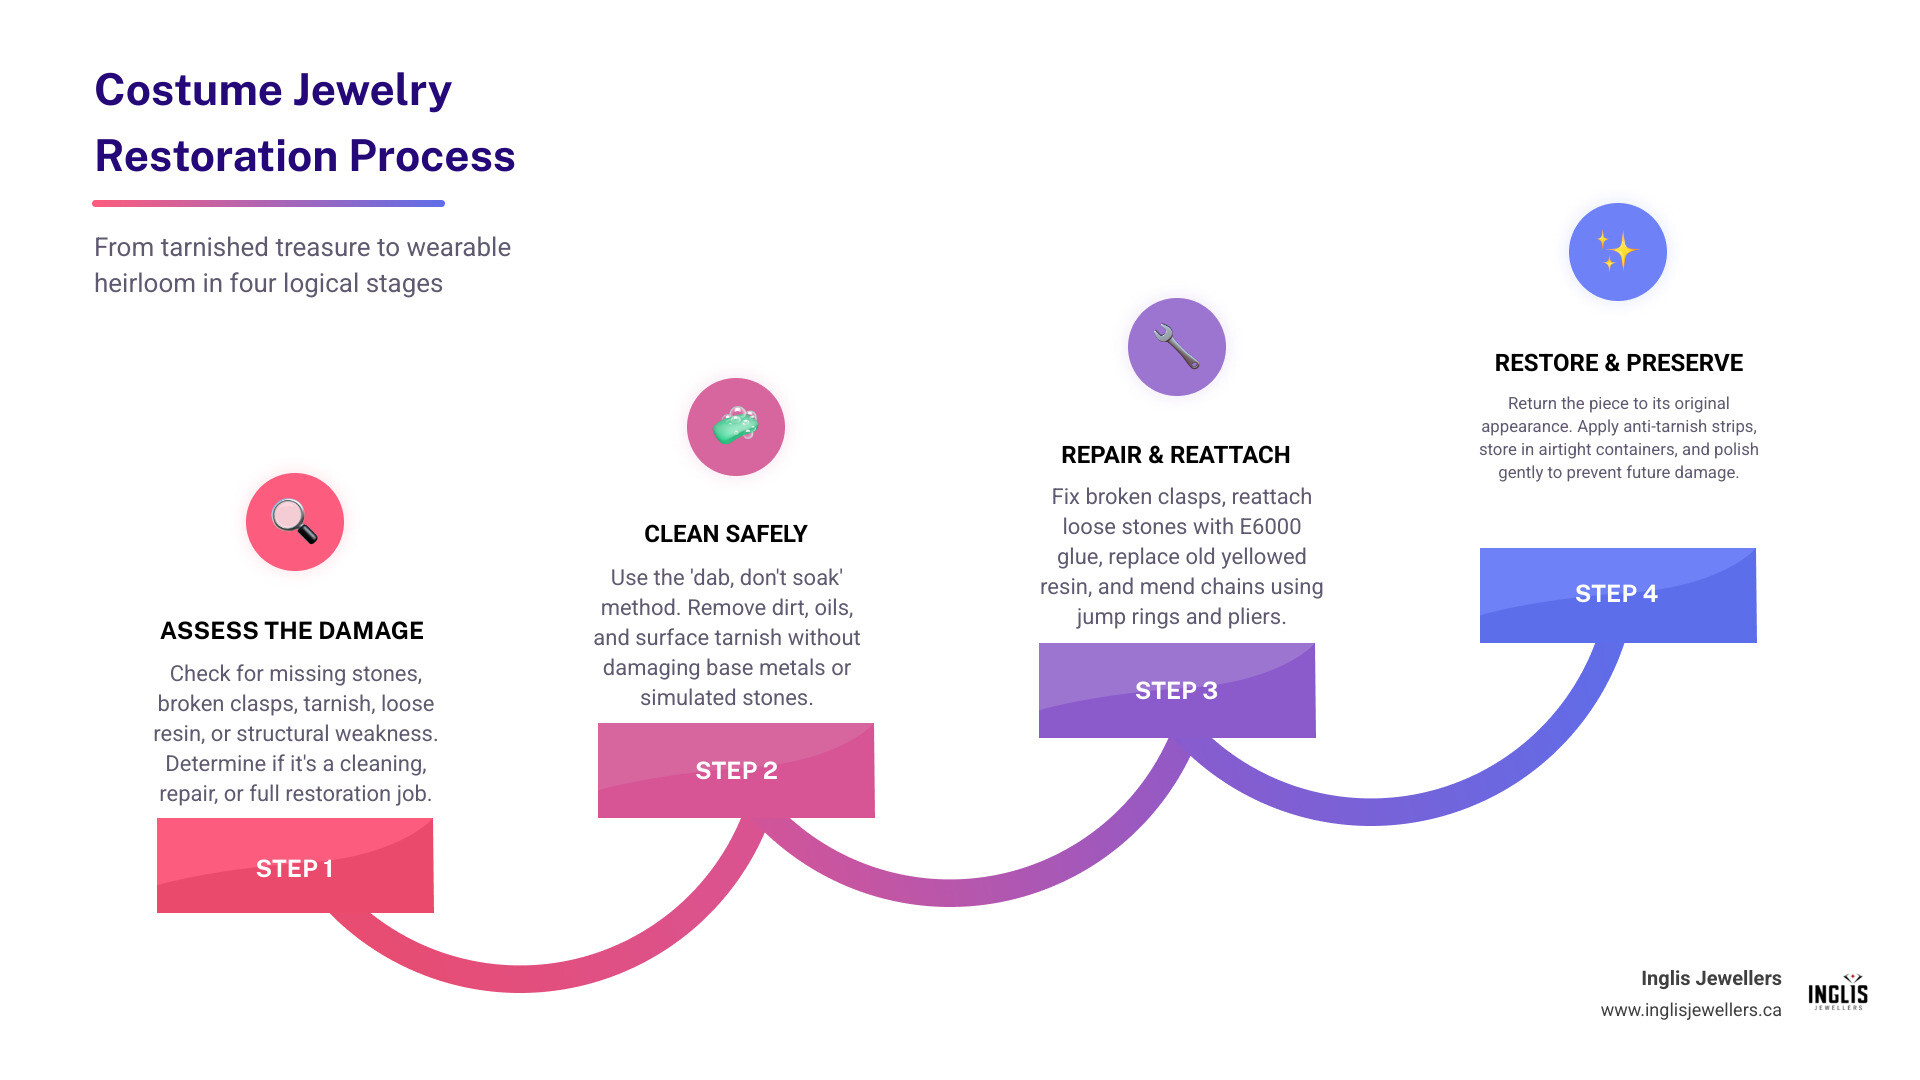
Cleaning, Repair, and Costume Jewelry Restoration: What is the Difference?
To understand how to save your favorite pieces, we first need to clear up some terminology. While people often use "cleaning," "repair," and "restoration" interchangeably, they represent very different levels of care.
- Cleaning: This is purely surface-level maintenance. It involves removing dirt, skin oils, makeup residue, and mild tarnish without altering the jewelry's structure. For daily wearers, a gentle clean keeps the piece bright and slows down chemical degradation.
- Repair: This is a targeted fix to solve a specific functional failure. If your necklace has a broken lobster clasp, a repair means swapping that clasp out. If a link has opened, a repair means closing it. It focuses on making the piece wearable again.
- Costume Jewelry Restoration: This is a holistic approach. Restoration addresses both the structural integrity and the aesthetic beauty of the entire piece. It may involve sourcing historically accurate replacement rhinestones, rebuilding worn-out prongs, replicating damaged enamel, removing old degraded resin, and applying professional-grade electroplating to restore worn base metals.
Unlike fine jewelry made of solid gold or platinum, costume jewelry is typically constructed using base metals (such as brass, copper, pewter, or zinc alloys) plated with an incredibly thin layer of precious metal. The stones are rarely held in by heavy metal prongs; instead, they are usually secured with industrial adhesives. Because of these delicate materials, any restoration work requires a specialized understanding of metal behavior and chemistry.
If you want to understand the full spectrum of what can be fixed on your favorite accessories, check out our Jewellery Repairs Complete Guide for a deeper look at the process.
Is Your Vintage Costume Jewelry Worth Restoring?

Before you roll up your sleeves or bring your jewelry into one of our showrooms in Nova Scotia or New Brunswick, it’s wise to perform a quick evaluation. Is the piece worth restoring?
To decide, we recommend looking at three primary factors:
1. Sentimental Value
This is the most common reason we see for costume jewelry restoration at Inglis Jewellers. If a brooch belonged to your grandmother, or a pair of clip-on earrings was worn by your mother at her wedding, the emotional value far outweighs any material worth. Restoring these family heirlooms preserves a tangible connection to your family's history.
2. Collectibility and Vintage Pedigree
Some vintage costume jewelry is highly collectible and commands impressive prices among enthusiasts. Designer pieces from renowned mid-century brands like Chanel, Miriam Haskell, Trifari, Weiss, CINER, or Judith Leiber are highly sought after. If you own a signed piece from one of these designers, professional restoration is almost always worth the investment. However, keep in mind that preserving the original character is key; over-polishing or removing the natural patina of a 1940s piece can actually decrease its historical value.
3. A Practical Cost-Benefit Analysis
If the piece has no sentimental value and is an unsigned, mass-produced fashion item, you should weigh the cost of repair against replacement. Simple DIY fixes cost next to nothing, but complex professional work requires specialized skills.
To help you decide, we recommend reading the Jewellery Restoration Guide: What Can Be Saved and How (2026), which provides a brilliant framework for assessing what is structurally salvageable versus what cannot be saved.
Essential Tools and Materials for DIY Costume Jewelry Repair

If you decide to tackle basic repairs at home, you don’t need an entire goldsmith's bench, but you do need the right specialized tools. Using the wrong household items (like kitchen pliers or standard super glue) can permanently ruin your jewelry.
Here is your essential DIY restoration toolkit:
- Jeweler's Pliers: You will want at least two pairs of chain-nose or flat-nose pliers. These allow you to hold and bend small metal components without scratching the delicate plating.
-
The Right Adhesives: Never use standard super glue (cyanoacrylate). It dries incredibly brittle, can chemically cloud acrylic stones, and leaves a white residue that is almost impossible to remove. Instead, use:
- E6000: An industrial-strength craft adhesive that dries clear and remains slightly flexible, allowing it to absorb shocks without releasing the stone.
- G-S Hypo Cement: A vintage-restoration favorite that comes with a needle-thin applicator tip, perfect for tiny rhinestones and delicate settings.
- Toothpicks and Cotton Swabs: Ideal for applying glue with pinpoint accuracy and cleaning up tiny overflows before they cure.
- Replacement Findings: Keep a small assortment of jump rings, split rings (which offer extra security for heavier pieces), and lobster clasps on hand.
- Painter's Tape or Putty: Excellent for holding loose stones or components in place while your adhesive cures over a 24-hour period.
For a deeper dive into assembling your home repair kit and sourcing parts, read How to Repair Costume Jewelry? - TinyGrab.
Step-by-Step Guide to Common Costume Jewelry Fixes
Now let's roll up our sleeves. Here is how to address the most common issues that plague vintage fashion jewelry.
Safe Cleaning and Tarnish Prevention
The golden rule of cleaning costume jewelry is: "Dab, don't soak."
Because costume jewelry utilizes glues to hold stones in place, submerging a piece in liquid or using an ultrasonic cleaner can dissolve the adhesive and cause your stones to fall out. Furthermore, hot water causes thermal expansion in the base metal, which breaks the bond with rigid glue.
The Safe Cleaning Process:
- Material Diagnosis: Inspect the piece. Are there glued stones? Is there exposed base metal?
- Mix Your Solution: Add exactly one drop of mild, unscented dish soap to a bowl of room-temperature water.
- Dab Gently: Dip a soft baby toothbrush or a cotton swab into the soapy water. Tap off any excess liquid so it is barely damp. Gently dab the surface and crevices of the jewelry.
- Dry Immediately: Wipe away any moisture immediately with a dry microfiber cloth. Use a hairdryer on the cool setting to evaporate any lingering moisture from hard-to-reach crevices.
Removing "Green Gunk" (Verdigris):
Verdigris is the bright green copper oxidation that forms when base metals react with body oils, sweat, and moisture. Never use acidic solutions like vinegar or lemon juice to clean it, as these acids will strip away the incredibly thin gold or silver plating. Instead, use a dry, wooden toothpick to gently scrape and flake the brittle green crust off the metal.
For more critical safety tips on avoiding the "toothpaste trap" (abrasive toothpastes will scratch your plating), check out How to Clean Costume Jewelry Without Ruining It.
Reattaching Loose and Missing Stones in Costume Jewelry Restoration
Foil-backed rhinestones are the crown jewels of vintage costume pieces. These stones rely on a micro-thin metallic backing to reflect light and sparkle. If moisture gets behind them, the foil ruins, leaving the stone looking dead and grey.
How to Reset a Stone:
- Clean the Setting: Use a wooden toothpick to gently scrape away any old, crusty glue residue from the metal cup.
- Source a Replacement: If the original stone is missing, you can search online for vintage jewelry salvage lots, or use modern glass rhinestones of the exact same millimeter size. If you cannot find a match, sometimes inserting a tiny cabochon or seed bead can create a beautiful, creative design alternative.
- Apply Glue Sparingly: Squeeze a tiny dot of E6000 or G-S Hypo Cement onto a piece of scrap paper. Use a toothpick to transfer a microscopic dot of glue to the center of the metal setting.
- Place the Stone: Use tweezers or a wax pickup tool to gently press the stone into the setting. Secure it with a tiny piece of painter's tape and let it cure undisturbed for 24 hours.
For creative ideas on upcycling mate-less earrings or broken brooches into modern pendants, read Rescuing Vintage Costume Jewelry Restyling and Repairing.
Replacing Old Resin in Costume Jewelry Restoration
Many mid-century and modern fashion pieces use colored resin inlays. Over time, exposure to oxygen and sunlight causes older epoxy resins to turn yellow, cloudy, or brittle.
How to Replace It:
- Soften and Remove: Apply gentle heat with a hairdryer on its low setting to soften the old resin. Use a small flathead screwdriver or craft knife to carefully pry the old resin out of the metal channel.
- Prep the Metal: Sand any remaining adhesive residue with fine-grit sandpaper, and wipe the metal clean with a lint-free cloth.
-
Select Your Resin:
- UV Resin: Cures in under 3 minutes under a UV lamp. It is ideal for thin, transparent layers.
- Epoxy Resin: Requires a 1:1 mixing ratio and takes several hours to cure, but is better for deeper settings or embedding elements.
- Apply and Cure: Slowly drip the resin into the setting using a toothpick. If bubbles appear, gently pass a hairdryer or lighter over the surface to pop them before curing.
For a comprehensive guide on mixing ratios, safety gear, and troubleshooting cloudy finishes, see How to Replace the Resin in Costume Jewellery | RESINPRO.
Fixing Broken Chains, Clasps, and Earring Backs
Most chain and clasp issues are rooted in open jump rings.
- The Lateral Twist: When opening a jump ring to replace a broken lobster clasp, never pull the ends outward to widen the circle. This weakens the metal and ruins its shape. Instead, use two pairs of pliers to twist the ends laterally (like opening a gate). Slide your chain and clasp on, then twist it back until the ends meet perfectly.
- Bead Restringing: If your vintage beaded necklace has snapped, it’s time for a rebuild. Standard bead restringing typically costs $1.00 to $2.50 per inch depending on the beads. If you are restringing glass pearls, we highly recommend adding individual knots between each pearl (which starts at $1.75 per inch). Knotting prevents the beads from rubbing together and scratching their delicate finish, and ensures that if the thread snaps, you won't watch your heirloom beads scatter across the floor!
DIY vs. Professional Goldsmithing: When to Seek Expert Help
While gluing a rhinestone or replacing a jump ring is a fun weekend project, there are moments when DIY attempts cross the line into dangerous territory.
The biggest hazard in DIY costume jewelry repair is heat. Standard costume jewelry is made from mystery base metals with incredibly low melting points. If you attempt to solder a broken metal component at home with a standard soldering iron or torch, you run a massive risk of melting the entire piece into a sad puddle of grey alloy.
Professional goldsmiths use specialized micro-soldering equipment, laser welders, and heat-sink clays to repair metal without damaging the surrounding plating or stones.
Professional Pricing and Lifespans:
- Soldering Repairs: Professional silver soldering typically starts at about $10.00 and up, while gold soldering starts at $20.00 and up depending on the complexity of the piece.
- Watch Battery Replacement: If your fashion watch has stopped ticking, professional battery installation usually costs between $9.00 and $12.00.
- Replating Finishes: If the gold finish has completely worn off your piece, exposing the dull grey or reddish base metal underneath, cleaning won't save it. It must be professionally electroplated. A high-quality application of two microns or more will last significantly longer than cheap, sub-micron flash plating, giving your piece a fresh one to three years of beautiful wear.
If you have a treasured family heirloom that requires structural rebuilding, we invite you to explore our Goldsmith Studio and read about Our Goldsmith Gallery Craftsmanship Custom and Care to see how our master jewelers bring delicate pieces back to life.
Whether you are looking for Antique Jewellery Repair or searching for a trusted team for Fine Jewelry Repair Near Me in Nova Scotia or New Brunswick, we are always here to help.
Frequently Asked Questions about Costume Jewelry Restoration
Can you solder costume jewelry at home?
We strongly advise against it. Costume jewelry is typically made of pot metals, tin, zinc, or lead alloys. These metals have incredibly low melting points compared to sterling silver or gold. Applying a standard home soldering torch will likely melt your beloved vintage brooch instantly. Professional laser welding is the only safe way to fuse broken base metals.
How do you prevent costume jewelry from tarnishing?
Follow the "Last On, First Off" rule. Always apply your perfumes, hairsprays, lotions, and makeup before putting on your jewelry, and take your jewelry off as soon as you get home. Wipe each piece down with a dry microfiber cloth after wearing to remove skin oils. Store your pieces in airtight zip-lock bags with silica gel packets or anti-tarnish strips to absorb moisture.
What is the best glue for repairing costume jewelry?
The absolute best all-around glue is E6000 because it dries clear, holds incredibly strong, and retains a tiny bit of rubbery flexibility to absorb drops. For incredibly small rhinestones, G-S Hypo Cement is preferred for its needle-thin precision applicator. Avoid super glue at all costs!
Conclusion
Your vintage costume jewelry represents a beautiful era of accessible glamour, playful design, and personal history. Just because a piece has lost its luster, dropped a stone, or suffered a broken clasp doesn't mean its journey has to end. With the right tools, some patience, and a "dab, don't soak" approach, you can easily tackle basic repairs at home.
And for those irreplaceable, deeply sentimental heirlooms that require a master's touch, we are here for you. At Inglis Jewellers, our trusted goldsmithing craftsmanship has been serving communities across Atlantic Canada — including our locations in Truro, New Glasgow, Sydney, and Riverview — for decades.
If you're ready to give your favorite vintage pieces the professional restoration they deserve, visit one of our showrooms or check out our comprehensive Jewellery Repairs Complete Guide to get started today!